Virt-ManagerFeatImage

Migrating VMs in Virt-Manager in Linux (Debian)

Installation 

Start by installing all the Virt-Manager packages and dependencies

sudo apt-get install qemu-kvm libvirt-daemon-system libvirt-clients bridge-utils virt-manager 
QEMU-KVMQEMU is a userland type 2 (i.e runs upon a host OS) hypervisor for performing hardware virtualization (not to be confused with hardware-assisted virtualization), such as disk, network, VGA, PCI, USB, serial/parallel ports, etc. It is flexible in that it can emulate CPUs via dynamic binary translation (DBT) allowing code written for a given processor to be executed on another (i.e ARM on x86, or PPC on ARM). Though QEMU can run on its own and emulate all of the virtual machine’s resources, as all the emulation is performed in software it is extremely slow.
LibvirtLibvirt is collection of software that provides a convenient way to manage virtual machines and other virtualization functionality, such as storage and network interface management. These software pieces include a long term stable C API, a daemon (libvirtd), and a command line utility (virsh). A primary goal of libvirt is to provide a single way to manage multiple different virtualization providers/hypervisors, such as the KVM/QEMU, Xen, LXC, OpenVZ or VirtualBox hypervisors (among others).
Bridge UtilsThe bridge-utils package contains a utility needed to create and manage bridge devices. This is useful in setting up networks for a hosted virtual machine (VM).
virtinstThe “Virt Install” tool (virt-install for short command name, virtinst for package name) is a command line tool which provides an easy way to provision operating systems into virtual machines. It also provides an API to the virt-manager application for its graphical VM creation wizard.
virt-managerThe virt-manager application is a desktop user interface for managing virtual machines through libvirt. It primarily targets KVM VMs, but also manages Xen and LXC (linux containers). It presents a summary view of running domains, their live performance & resource utilization statistics. Wizards enable the creation of new domains, and configuration & adjustment of a domain’s resource allocation & virtual hardware. An embedded VNC and SPICE client viewer presents a full graphical console to the guest domain.
Software Required

Add “libvirtd” Group and User

sudo addgroup libvirtd 

Add a new user called “libvirtd” on the new host computer with the command:

sudo adduser libvirtd 

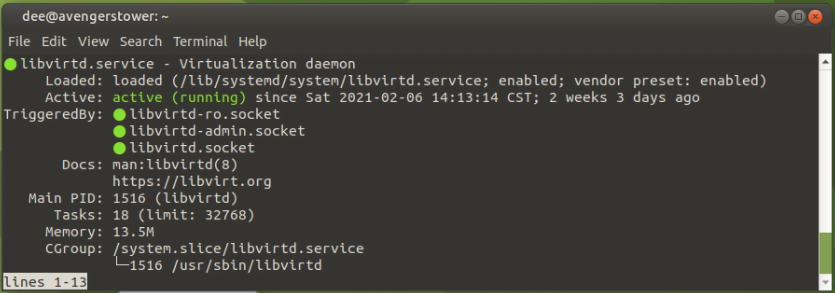
Start the service and check status

Start the service with the following command:

sudo service libvirtd start 

Enter your password. As long as there are no errors, then proceed by checking the status of the service with the following command:

sudo service libvirtd status 
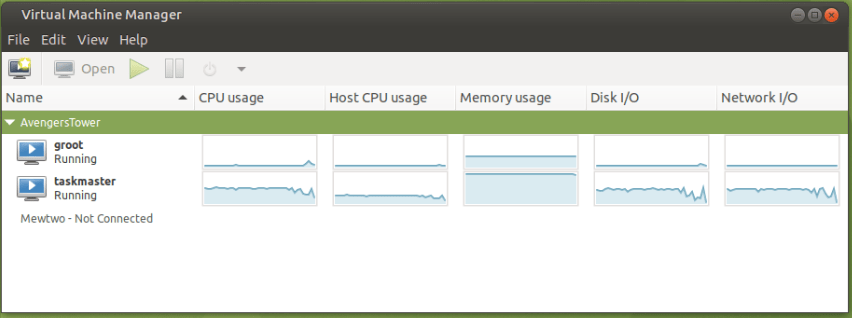
Launch the Virt-Manager Program

sudo virt-manager 
Prepare and move VM’s to move to new host 

Source Host – Shutdown the VM

First shutdown the Virtual Machine with the code below.

Change “VMNAME” to your VM name.

virsh shutdown VMNAME 

If you wish you, you can verify that the machine is inactive with the following command:

sudo virsh list --inactive

Create the XML Dump File

The virsh dumpxml command will return the guest virtual machine’s XML configuration file which you can then use, save, or change as needed.

The XML file (VNAME.xml) can then be used to recreate the guest virtual machine. You can edit this XML configuration file to configure additional devices or to deploy additional guest virtual machines.

The following example retrieves the XML configuration of the VMNAME virtual machine, writes it into the VMNAME.xml file in /tmp folder, and then verifies that the process has been completed successfully.

virsh dumpxml VMNAME > /tmp/VMNAME.xml 

Move the XML file to the new Host using SCP

Using SCP we can transfer the XML file to the new host with the following command.

scp /tmp/VMNAME.xml TARGETHOST:/tmp/VMNAME.xml 

Where “TARGETHOST” is the hostname of the new host. and “VMNAME” is the name of your Virtual machine.

Note that the command will transfer the file to the new host /tmp directory.


Move the Virtual Disk file to the new Host using SCP

Using SCP we can transfer the Disk file to the new host with the following command.

scp /var/lib/libvirt/images/VMNAME.qcow2 TARGETHOST:/var/lib/libvirt/images/VMNAME.qcow2 

Where “TARGETHOST” is the hostname of the new host. and “VMNAME” is the name of your Virtual machine.

Note that the command will transfer the file to the new host /var/lib/libvirt/images/ directory, where the disks reside. If you have your disks located elsewhere, update the directories.

It is crucial that you place the disks in the right directory so that once we define the VM in the host, it locates it in the same directory.

Failure to do this will result in errors as the disk will not be found when you attempt to boot up.

Create the VM in the new host, and boot up

Create the VM in the new host with virsh define

Virtual Machines managed by virsh are created by describing the virtual machine in a libvirt XML file, and importing that XML file into virsh.

We already have our XML file and we simply need to import it into the new Virt-Manager configuration. Use the following command:

virsh define /tmp/VMNAME.xml 

Where “VMNAME” is the name of your XML File

Boot up!

If you open the GUI, then you should see your VM in the new host. If you choose to use the command line, you can boot the machine with the following command:

virsh start VMNAME

Where “VMNAME” is the name of your Virtual Machine

Source Host – Delete VM

Once you have confirmed operation you probably want to remove the source VM from the Source Host. 

virsh undefine VMNAME 

Where “VMNAME” is the name of your Virtual Machine

When ready, you can delete the disk from the old host as well, if you wish.

rm /var/lib/libvirt/images/VMNAME.qcow2 

Congratulations! You are now good to go!

How to install MacOS VM on Linux (Debian) – QEMU/KVM

This is my first tutorial for my Tech Blog.

For my work as Product Managers, we are build a mobile app for both iOS and Android using Xamarin. 

I needed to utilize a Virtual iOS Device and while there are some options on the web, I need a non-paid option due to budget restrictions from Management. 

Because I have switched over to Linux, and I honestly prefer Linux now, I decided to do some research on a MacOS VM on Linux. 

I already use KVM for a Windows machine and other Linux Distros. So I went on my mission to research how to perform the install.

I ran into some problems and had to source information from many different location. Hoping that this will help others in the same position. 

So let’s begin!

After updating your system, we will install the necessary software, if not already installed. 

Prepare Environment – Updates and Install Req. Software

Let’s start by checking for any new updates that the system may require.

sudo apt update

After updating your system, we will need to install the necessary software. Below I have added quick descriptions of the main software you will be installing.

QEMUQEMU is a userland type 2 (i.e runs upon a host OS) hypervisor for performing hardware virtualization (not to be confused with hardware-assisted virtualization), such as disk, network, VGA, PCI, USB, serial/parallel ports, etc. It is flexible in that it can emulate CPUs via dynamic binary translation (DBT) allowing code written for a given processor to be executed on another (i.e ARM on x86, or PPC on ARM). Though QEMU can run on its own and emulate all of the virtual machine’s resources, as all the emulation is performed in software it is extremely slow.
LibvirtLibvirt is collection of software that provides a convenient way to manage virtual machines and other virtualization functionality, such as storage and network interface management. These software pieces include a long term stable C API, a daemon (libvirtd), and a command line utility (virsh). A primary goal of libvirt is to provide a single way to manage multiple different virtualization providers/hypervisors, such as the KVM/QEMU, Xen, LXC, OpenVZ or VirtualBox hypervisors (among others).
Bridge UtilsThe bridge-utils package contains a utility needed to create and manage bridge devices. This is useful in setting up networks for a hosted virtual machine (VM).
virtinstThe “Virt Install” tool (virt-install for short command name, virtinst for package name) is a command line tool which provides an easy way to provision operating systems into virtual machines. It also provides an API to the virt-manager application for its graphical VM creation wizard.
virt-managerThe virt-manager application is a desktop user interface for managing virtual machines through libvirt. It primarily targets KVM VMs, but also manages Xen and LXC (linux containers). It presents a summary view of running domains, their live performance & resource utilization statistics. Wizards enable the creation of new domains, and configuration & adjustment of a domain’s resource allocation & virtual hardware. An embedded VNC and SPICE client viewer presents a full graphical console to the guest domain.
Software Required
sudo apt -y install qemu-kvm libvirt-daemon qemu-system qemu-utils python3 python3-pip bridge-utils virtinst libvirt-daemon-system virt-manager

Now, we must ensure the vhost_net module is loaded and enabled in our system. We do that by running the following commands one after the other:

sudo modprobe vhost_net
lsmod | grep vhost

The first command will not return a response. 

The second one will return the information required. 

Below is a sample of the two commands:

Now, let’s start KVM witht he following commands:

$   sudo systemctl start libvirtd

$   sudo systemctl enable libvirtd

$   sudo dnf -y install virt-manager

Now, to verify the installation, we can verify the Modules are loaded in our system.

lsmod | grep kvm

Sample of my output:

Now that we have the software installed, we can locate the MacOS image we want to install. Bringing us to the next step.

MacOS Media – GIT

If you do not already have GIT installed, please do so by using the command below:

sudo apt -y install git

We must clone the Project Code from github. Do this with the following command:

git clone https://github.com/foxlet/macOS-Simple-KVM.git

Change to the download directory

cd macOS-Simple-KVM

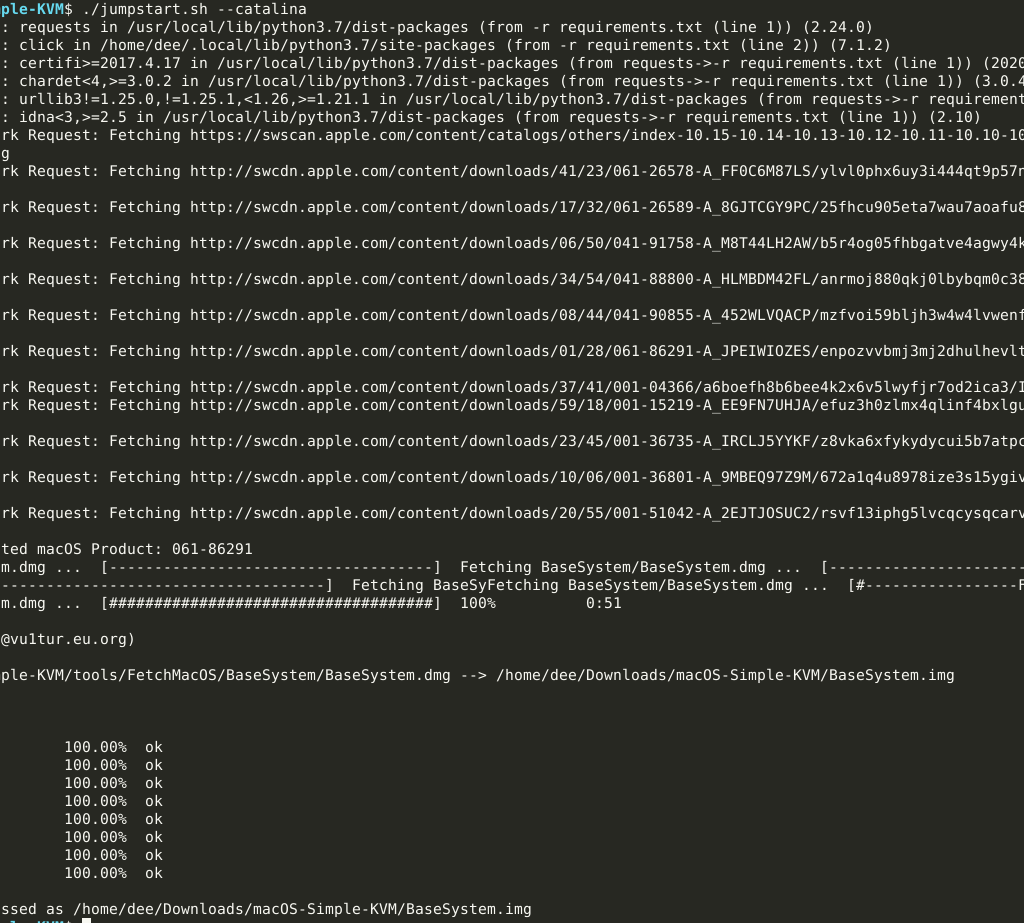
Ensure that you have an active internet connection as we will now download the MacOS Image.

By default, the installation will choose the latest version of MacOS. But you can select your own by changing the “–catalina” to another version.

Such as:

  • HighSierra = –high-sierra
  • Mojave = –mojave

In the example below, I have chosen to install Catalina.

./jumpstart.sh –catalina

Sample Output:

Congratulations, you have a working MacOS Install Image ready to work with now. 

Now, we must boot the machine up and install the OS.

Booting up and Install

We need to create an empty hard disk for the Machine we are building. We will build it using qemu-img.

I will create my disk with 50GB and call it “macOSvm” the file extension is qcow2 for use with qemu.

qemu-img create -f qcow2 macOSvm.qcow2 50G

-drive id=SystemDisk,if=none,file=macOSvm.qcow2 \
-device ide-hd,bus=sata.4,drive=SystemDisk \

Now, run the command

./basic.sh

This command will execute the VM to boot up using QEMU.

Once the VM boots up, click on the MacOS icon to install.

Wait for the installer

Click on “Disk Utility” in the next screen. We will format our disk.

After formatting, we can now install the OS on the newly formatted drive. Go to Disk Utility and select “Reinstall MacOS”

Click CONTINUE to confirm the installation

Select your disk

Now we wait for the install to complete

MacOS is now installed on the hard disk.

Moving to VM to Virt-Manager

Ialready use Virt-Manager, so I didn’t want to use QEMU. Therefore I had to import this VM into Virt-Manager.

This can be done fairly simple by using the make.sh file in the original GIT download.

Simply use the following command:

sudo ./make.sh –add

After running the command above, add macOSvm.qcow2 as storage in the properties of the newly added entry for VM.

You can do this via editing the XML of the machine or you can add the new storage device through the Virt-Manager UI.

Boot up your machine and enjoy MacOS on your Linux Environment!